In Google Docs, you can create and customize multilevel lists in your document with ease. You can format your lists with bullets, numbers, or even alphabetized them. Let’s take a look at the process.
How to Create a Multilevel List
Fire up a browser, head to your Google Docs homepage, and open a new document.
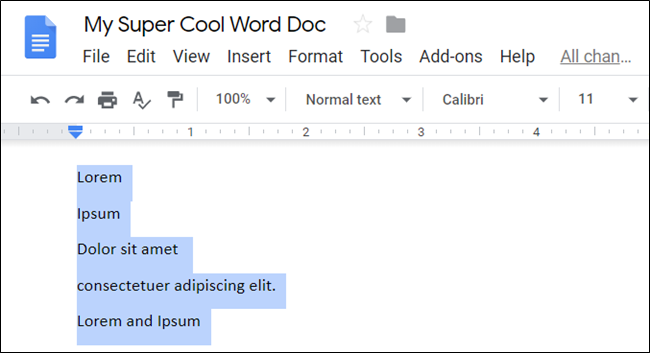
It’s effortless to create a multilevel list in Google Docs. All you have to do is type on a line to begin your list, press Enter after the first item to start a new line, type the next item on your list, and so on. When you’ve typed all the items on your list, highlight all the lines.
Next, click Format > Bullets & Numbering > Numbered List, and then choose a formatting style from the list.
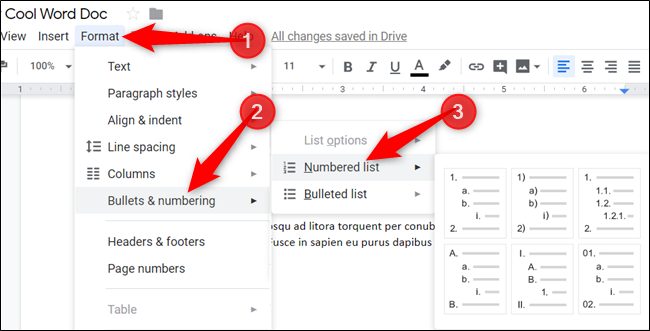
For this guide, we’ll use a numbered list. If you prefer a “Bulleted List,” choose that instead.
Your list is formatted in the style you chose.
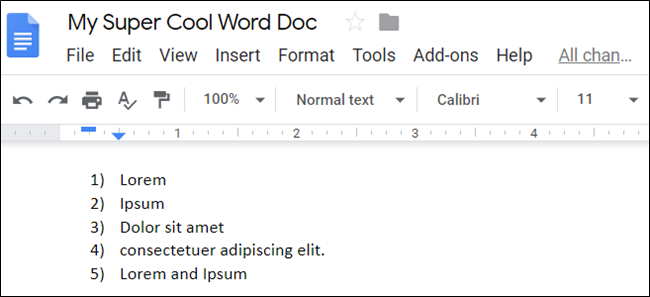
While this is a single-level list, the process to create a multilevel list in Docs isn’t much different. When you start to demote and promote items, that’s when it becomes a true multilevel list.
Demote and Promote Lines in Your Multilevel List
Demoting a line indents an item to a lower list level under the previous item, and promoting an item does the opposite.
To demote an item, place your cursor at the beginning of the line.
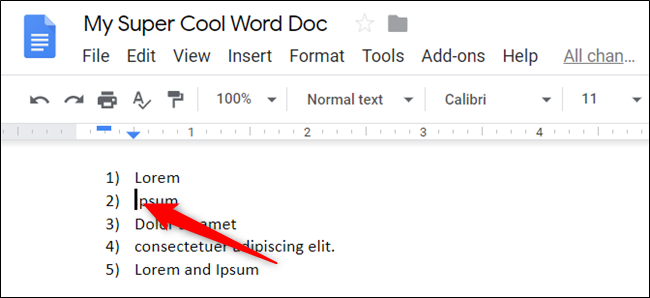
Next, press Tab to send the item to the lower list level.
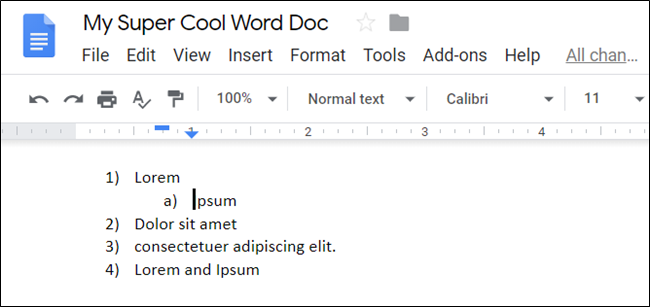
If you want to demote an item more than once down a line, continue to press Tab. You can demote an item up to eight times. In our example, we demoted the third line in our list twice.
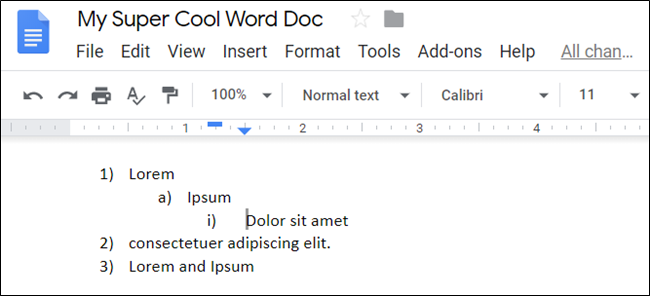
Repeat the steps until you’re satisfied with your multilevel list.
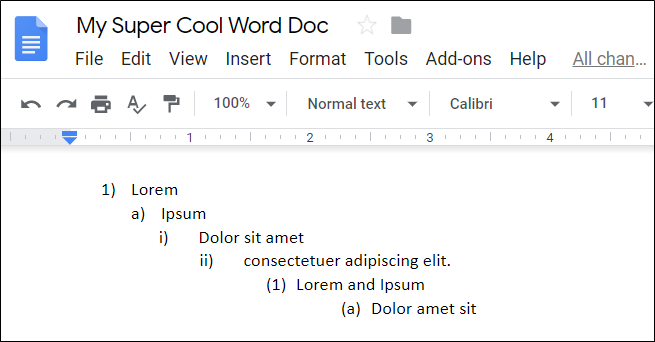
If you want to promote a line (move it up one level), you can use a keyboard shortcut. Place the cursor at the beginning of the line, and then press Shift+Tab.
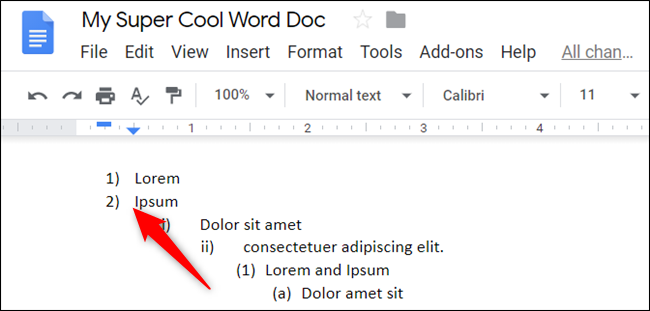
You can use this method on multiple lines simultaneously. First, highlight the lines in the list you want to promote.
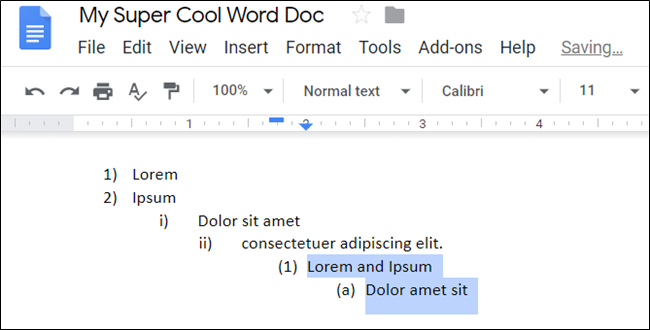
Next, hit Tab or Shift+Tab to demote or promote the list items.
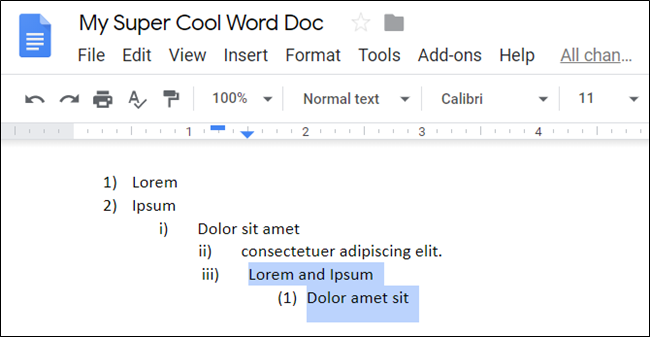
How to Change the Format of a Multilevel List
If you want to change the basic format of your multilevel list, it’s simple! If you initially chose a numbered list, but decide you want a bulleted list, it’s no problem! It only takes a few seconds to change from one format to another.
Place the cursor anywhere in the list, click the Bulleted list (or Numbered list) icon, and then choose a style from the drop-down menu.
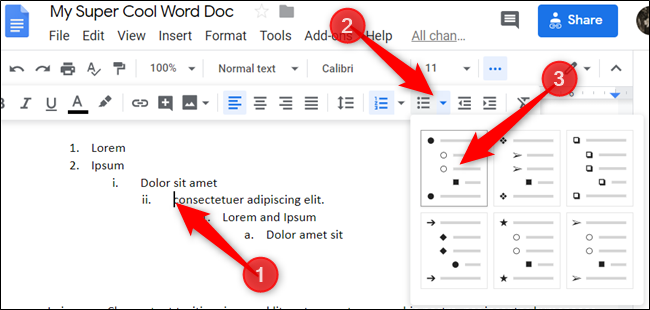
Just like that, the whole list changes to the new style you selected.
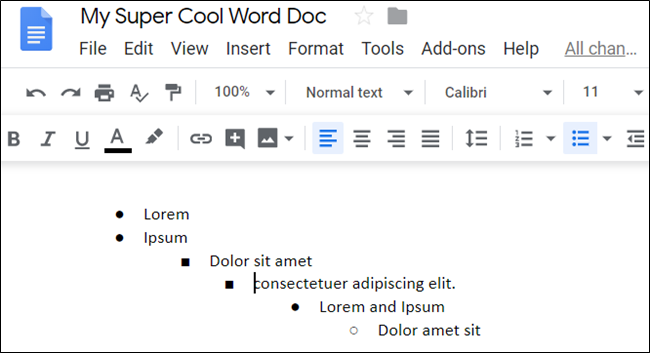
How to Customize a Multilevel List
While the level of customization in Google Docs pales in comparison to Microsoft Word, you can use colors and unique bullets to personalize your multilevel lists.
If you want to add some color, highlight a line in your multilevel list.
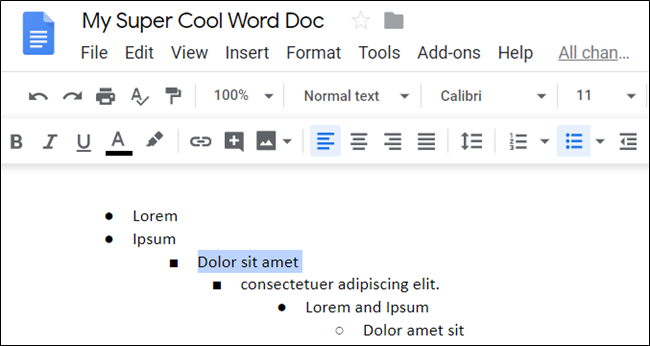
Next, click the Text Color icon in the toolbar and choose a color from the palette.
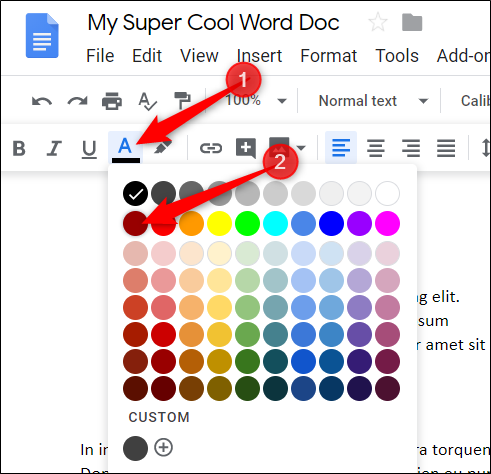
Repeat this step for each line you want to make more vibrant.
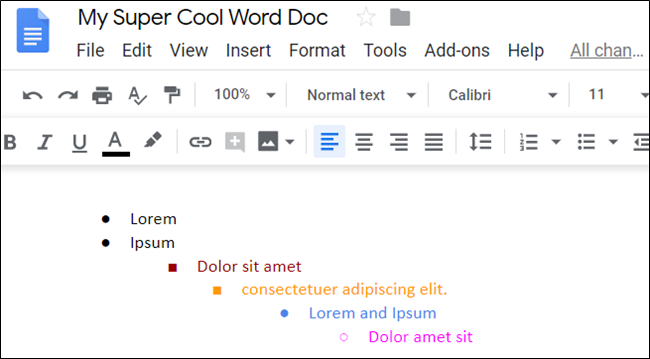
You can also customize every bullet in your list with a symbol, special character, emoji, or anything else available in the Google Docs special character list.
RELATED: How to Insert Symbols into Google Docs and Slides
To do so, double-click the bullet or number you want to change, and then right-click it to open the context menu. You can choose from a few options in the context menu or click “More Bullets” to see the full list of special characters.
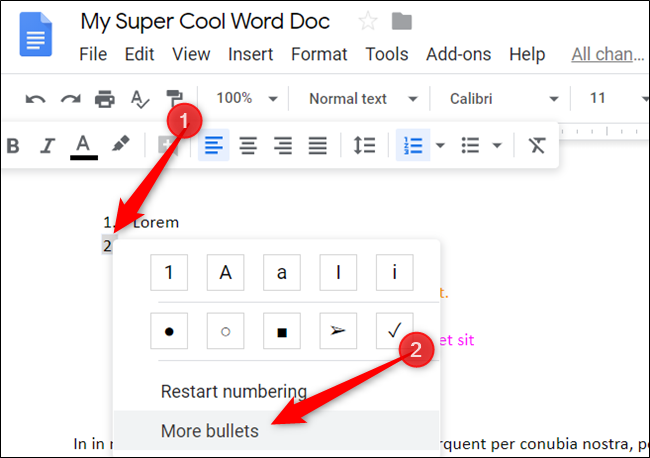
Click the second drop-down menu to choose a category. There are a lot, so be prepared to spend some time browsing.
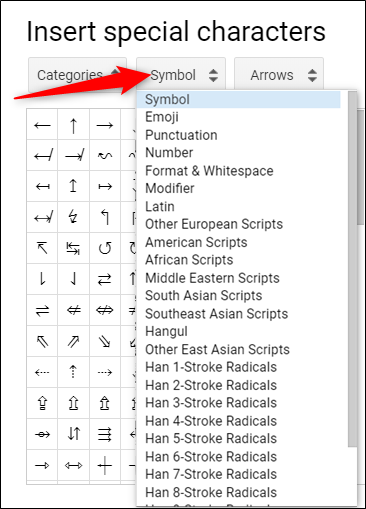
Click the third drop-down menu to refine the characters even further.
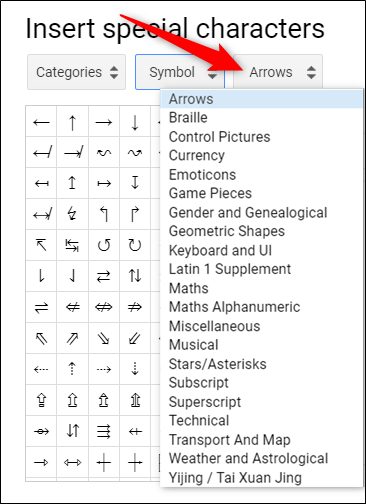
Once you’ve chosen the categories, click the character you want to designate it as the new bullet.
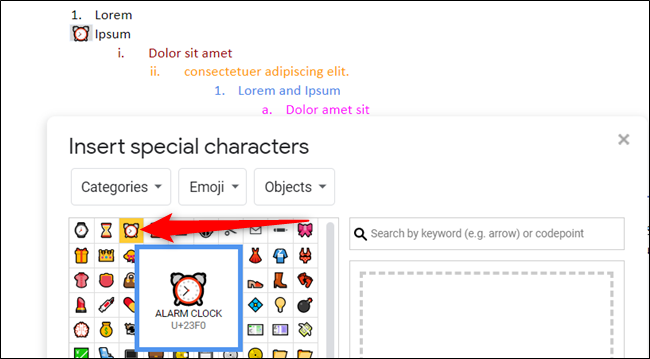
An alarm clock is a ridiculous choice for a bullet, but you can choose anything you want.
Repeat this process for each bullet you want to replace until you’re satisfied with your multilevel list.

These custom bullets act as the new style for your list. Anytime you promote or demote an item, it will do so with the current level’s bullet (provided you’ve chosen one for that level).
That’s all there is to it!




Leave a Reply
Want to join the discussion?Feel free to contribute!